How to Teach Your AI Agents to Send Emails - Step-by-Step Guide
Email integration for AI agents opens up entirely new possibilities: Automated updates, reports, and notifications directly via email.
How to Teach Your AI Agents to Send Emails - Step-by-Step Guide
Email integration for AI agents opens up entirely new possibilities: Instead of just providing answers in chat, your agents can directly send you important updates, send reports to other team members, or even send automated notifications. This is much more practical than constantly checking the workspace.
In this guide, I'll show you how to make your Evoya AI agents email-capable in just a few steps.
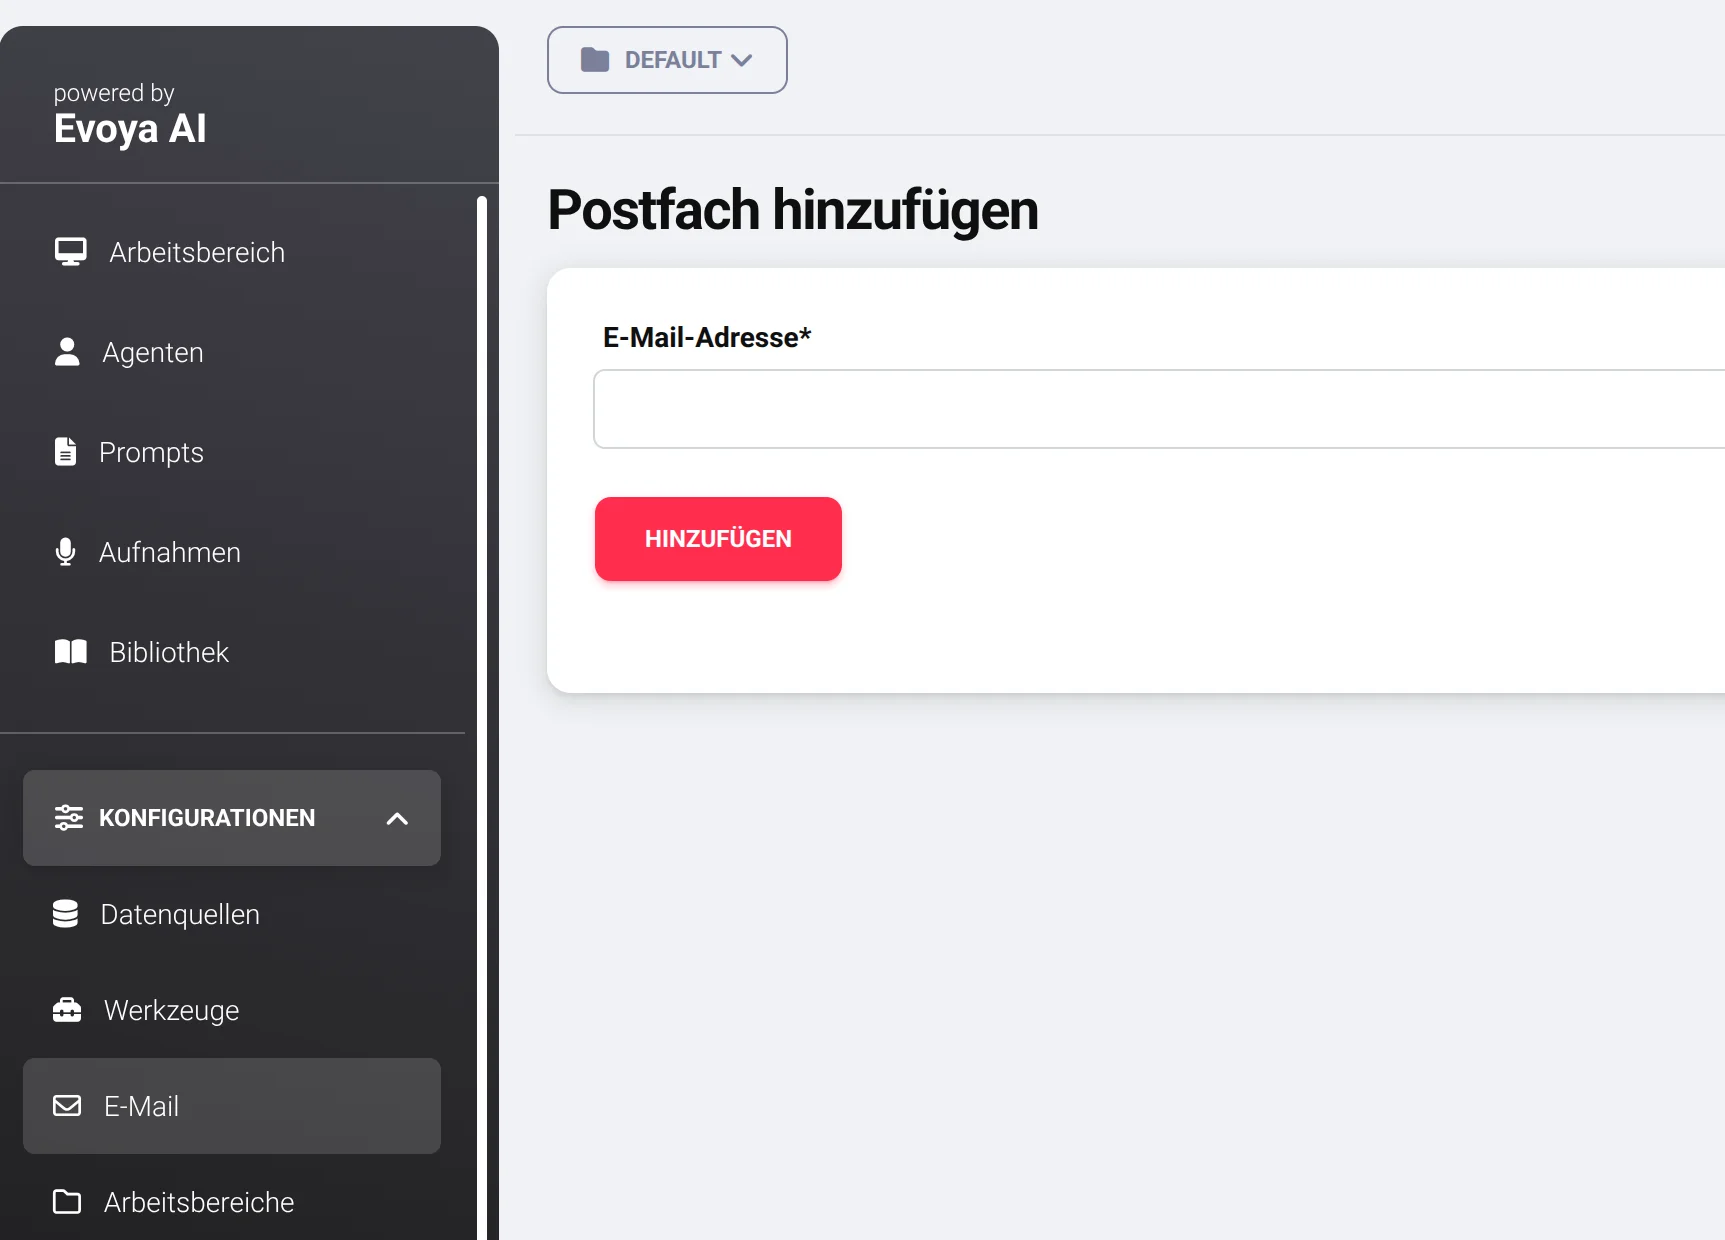
1. Set Up Email Account
First, you need an email account with IMAP and SMTP functions (standard with most providers). For initial testing, you can set up a separate account - for production use, we recommend integrating your existing team mailboxes.
Navigate to Configuration > Email in your Evoya Workspace.
When filling in the IMAP/SMTP data, typically:
- IMAP username = Email address
- IMAP password = Email account password
- Server details are provided by your administrator or ISP
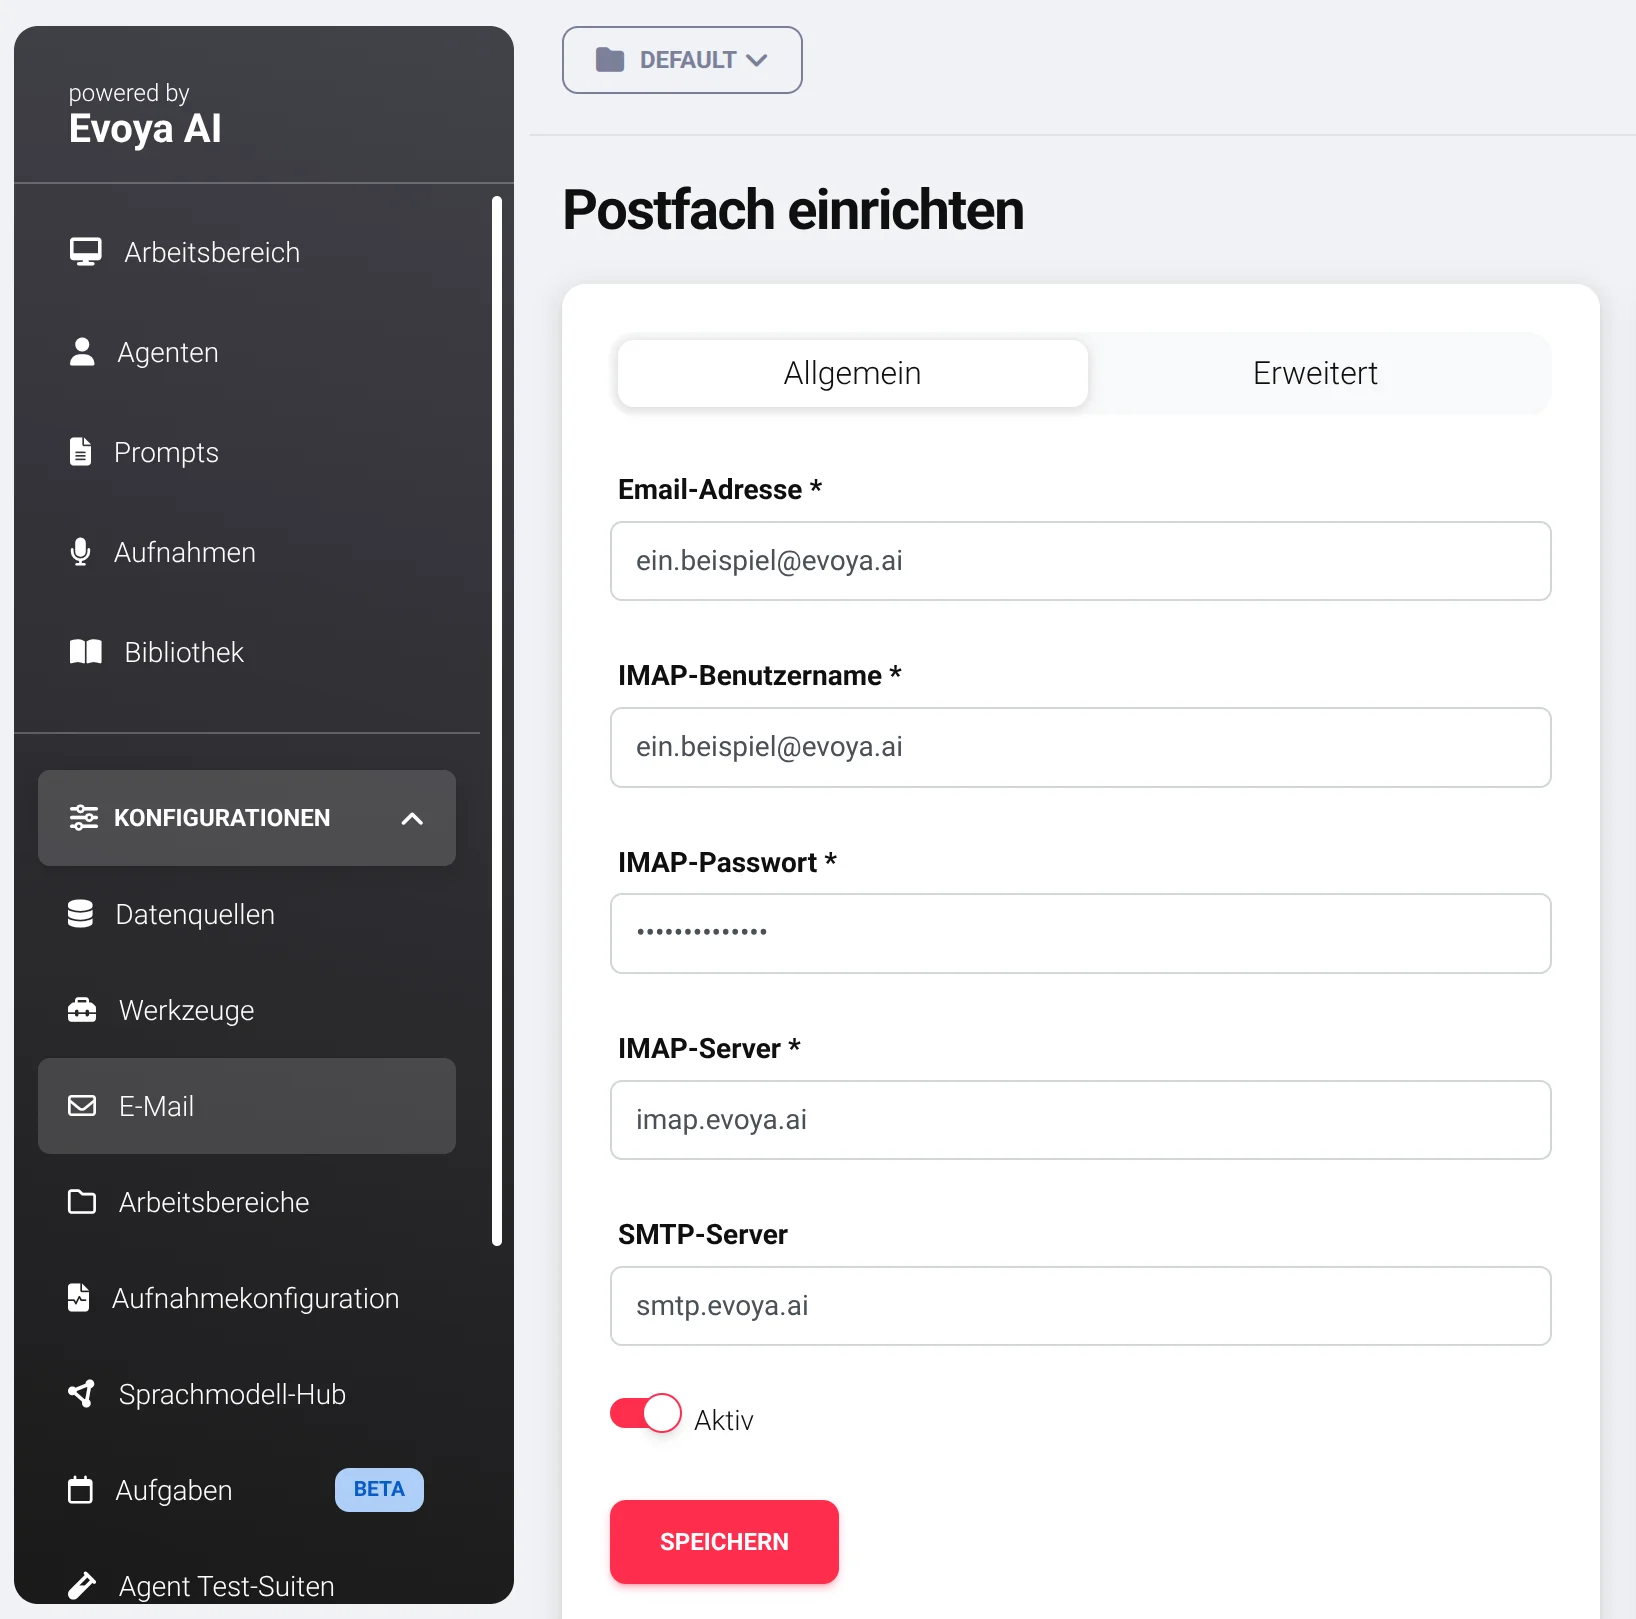
After saving, the system automatically checks the connection. If errors occur, verify the details again.
💡 Tip for Gmail & Microsoft: These providers require additional steps for IMAP access. For Gmail accounts, you can find detailed steps here.
2. Create "Send Email" Tool
Next, create an agent tool for sending emails. Go to Configuration > Tools.
Important configuration points:
- Tool name & description: Clearly formulate so the agent knows when to use the tool
- Mailbox: Select the previously configured mailbox
- Define action: "Send" for automatic sending or "Create draft" for manual control
- BCC address: Optional for copies of all agent emails
- Footer: Automatic signature for all emails
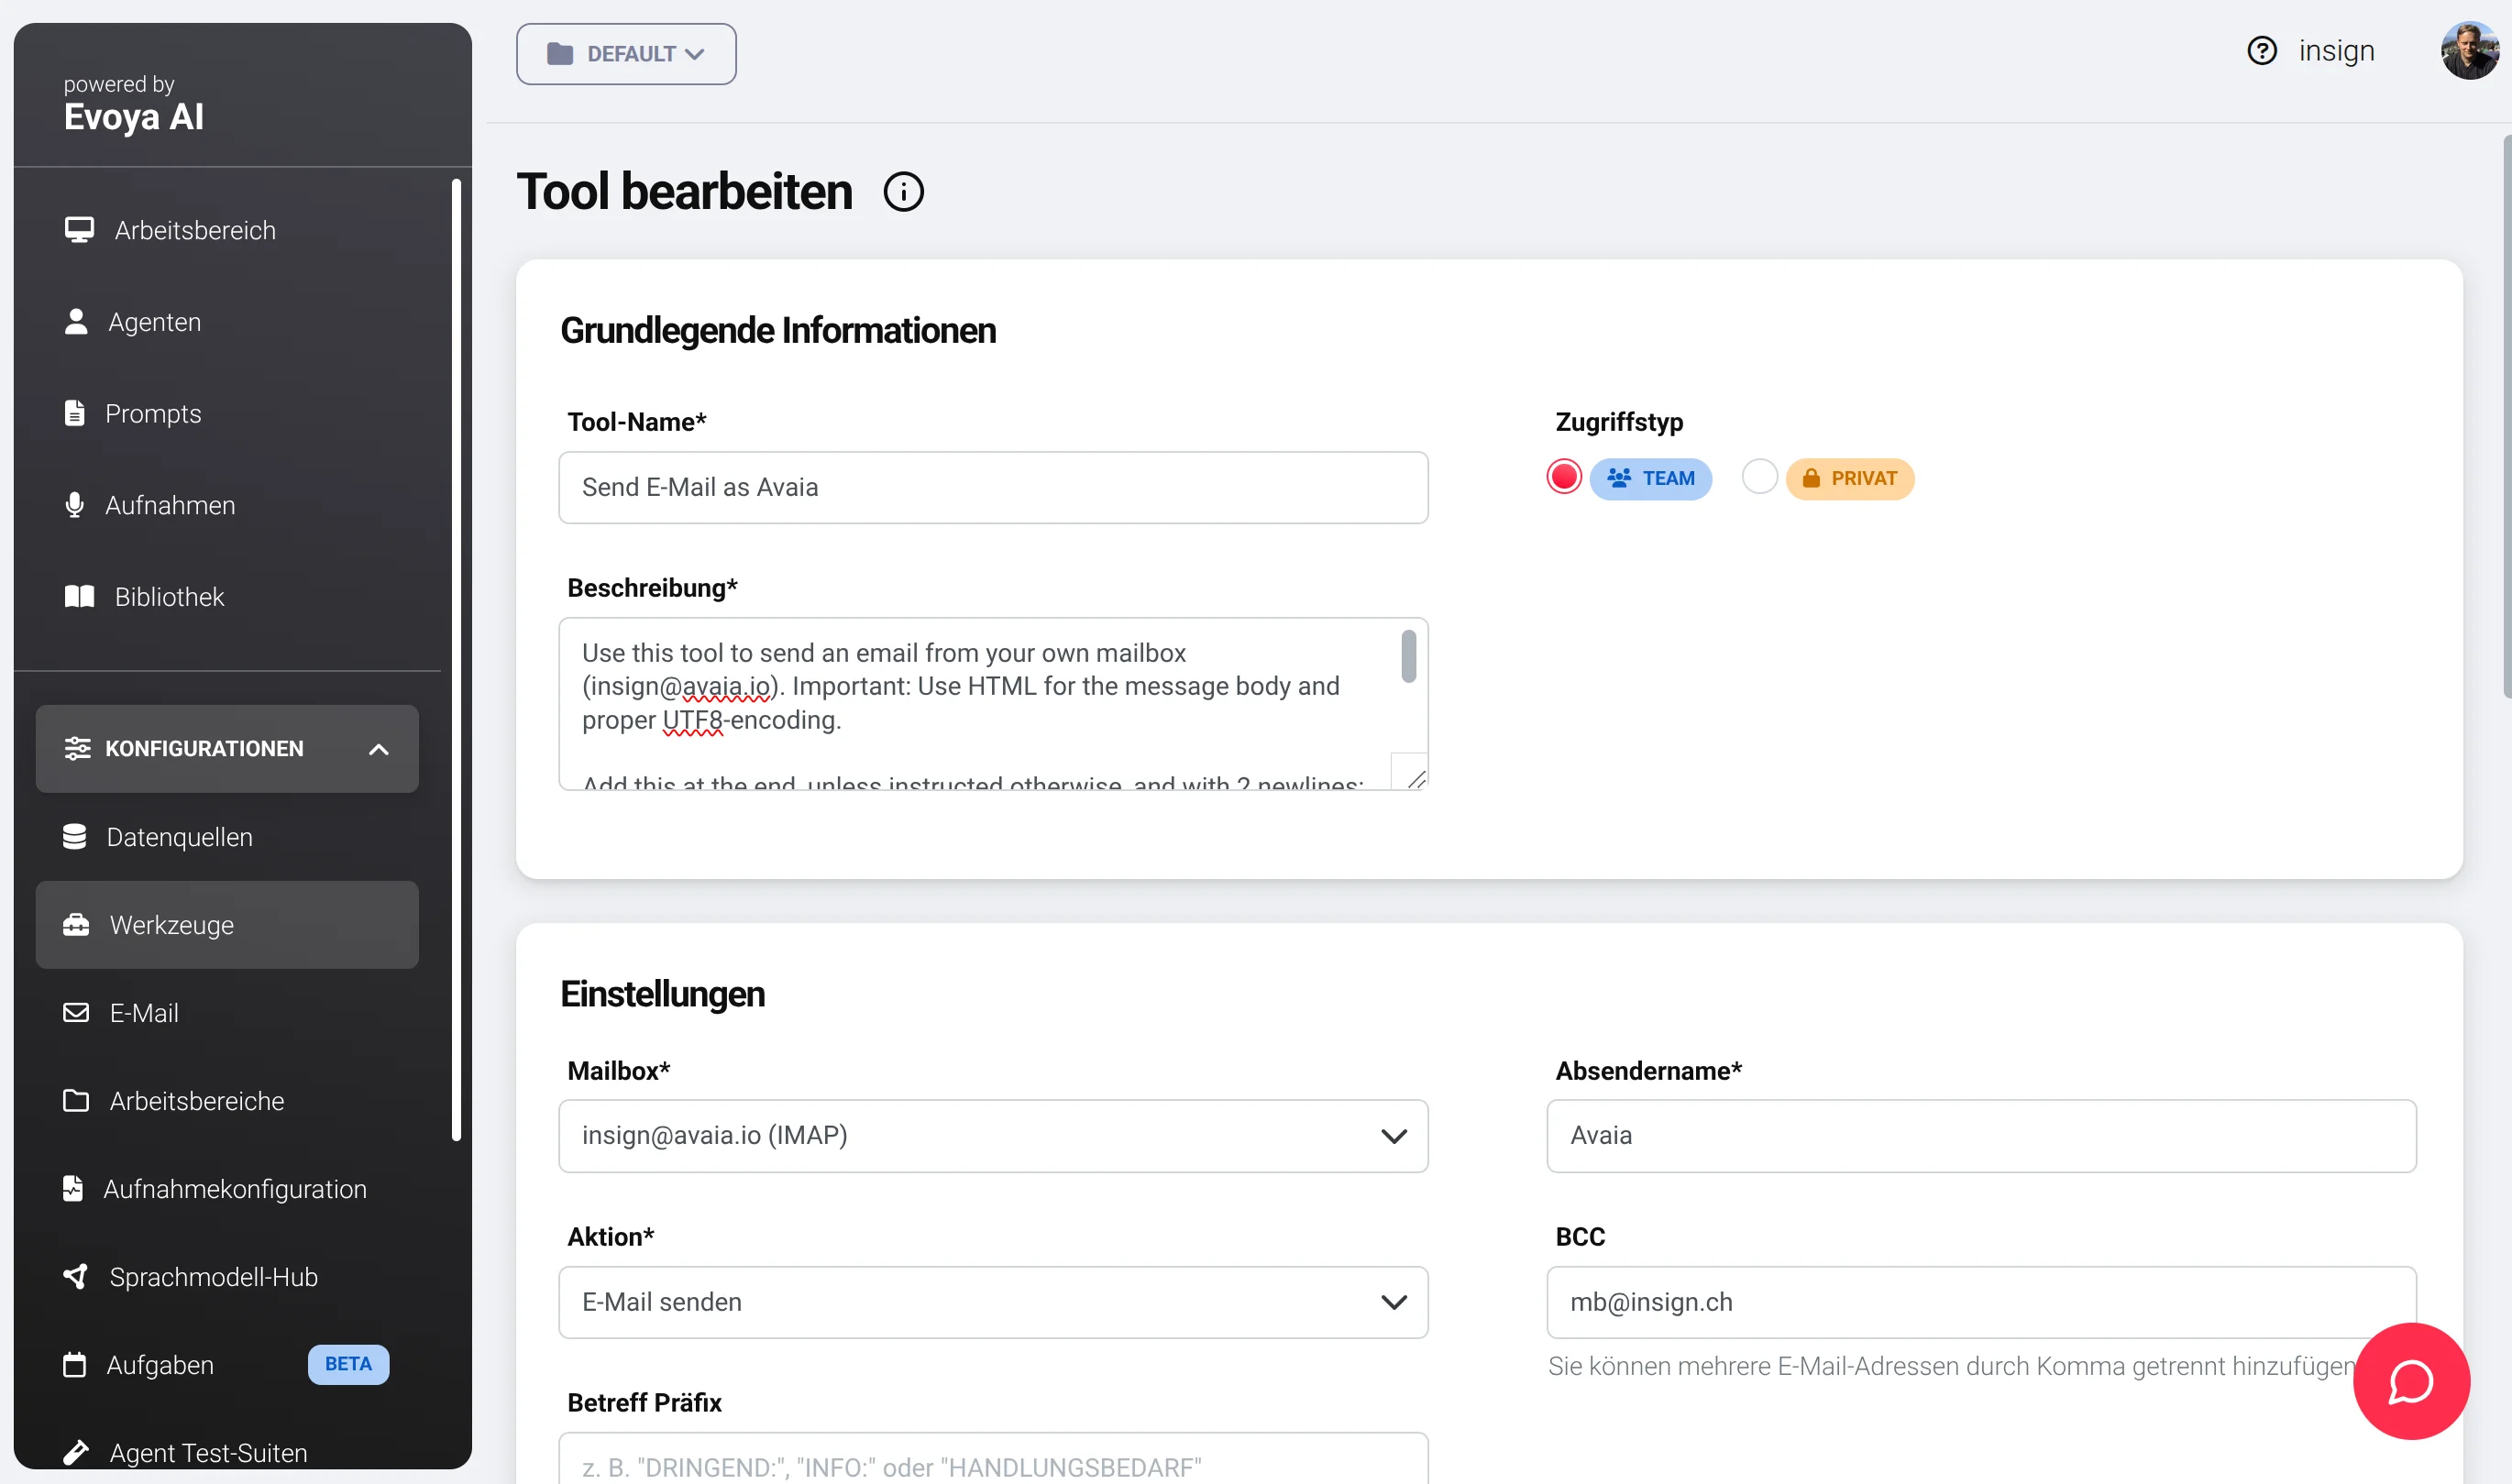
Pro tip: For internal emails use "Send", for external communication better use "Create draft" for control.
3. Equip Agents with the Email Tool
Now equip your desired agents with the new email tool. Under Agents, edit the corresponding agent.
Scroll down to "Select tools" and click "Add":

In the tool selection, activate the email tool:
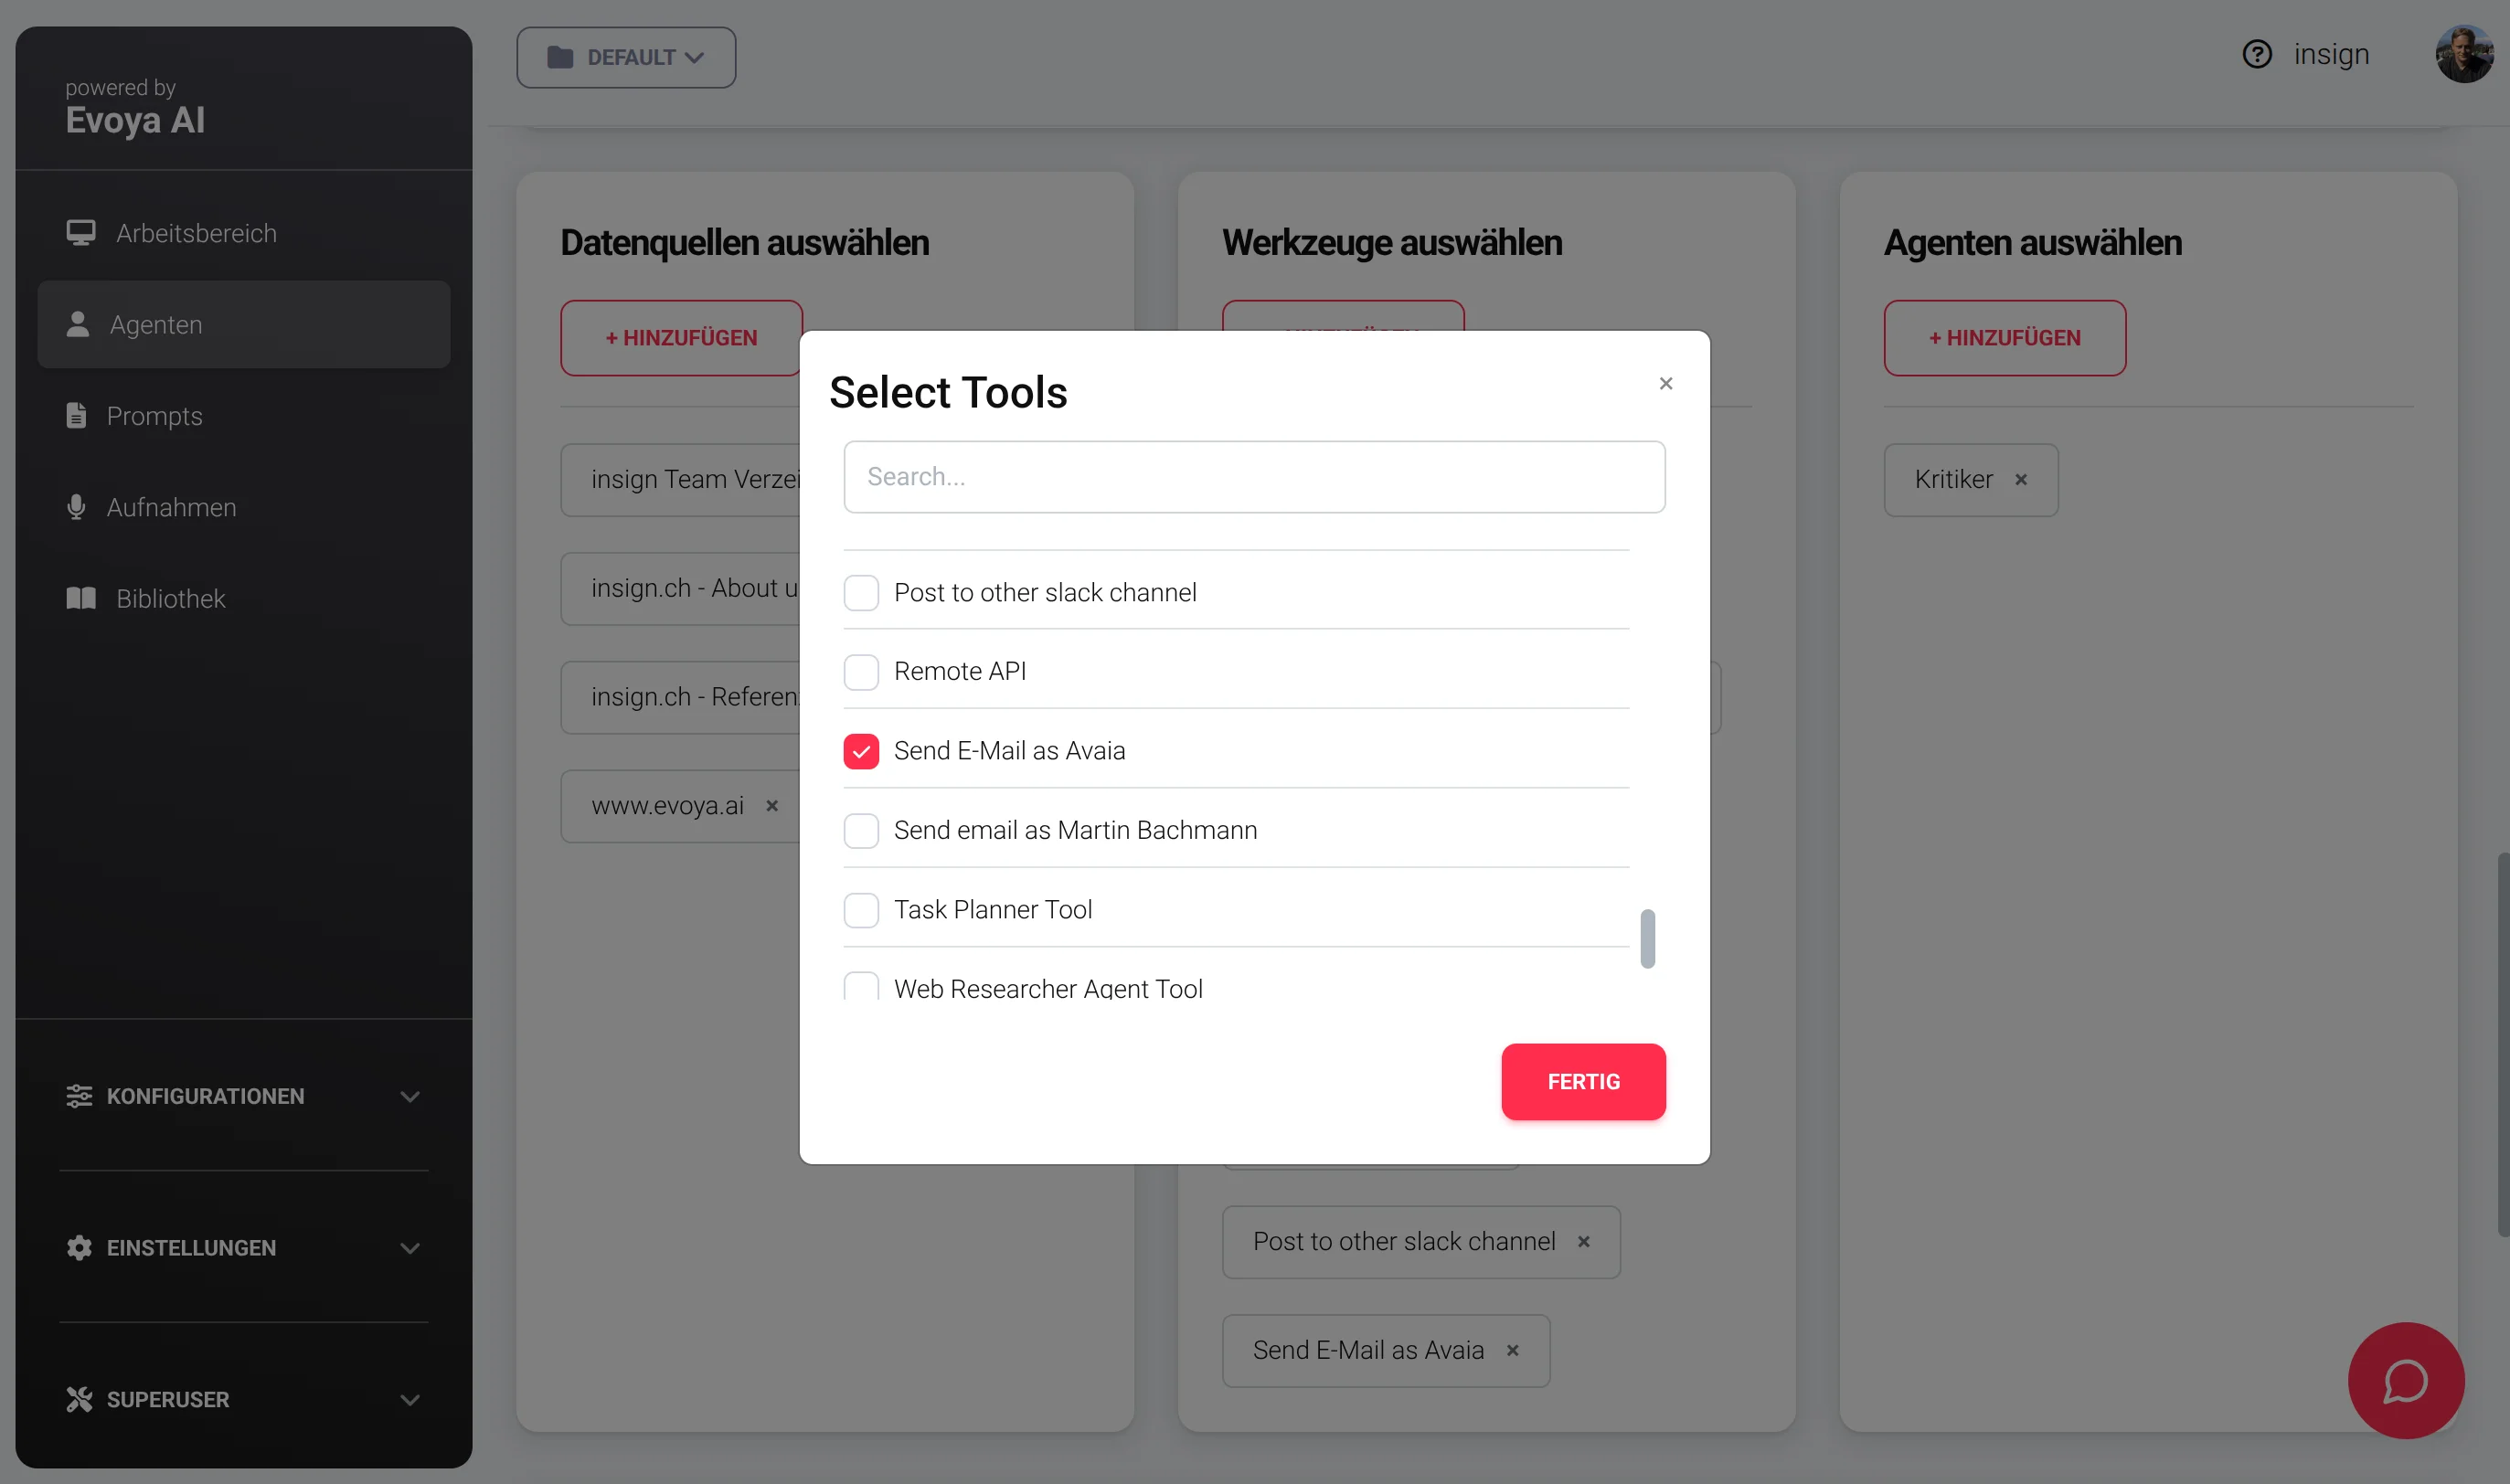
Save the agent and test it right away!
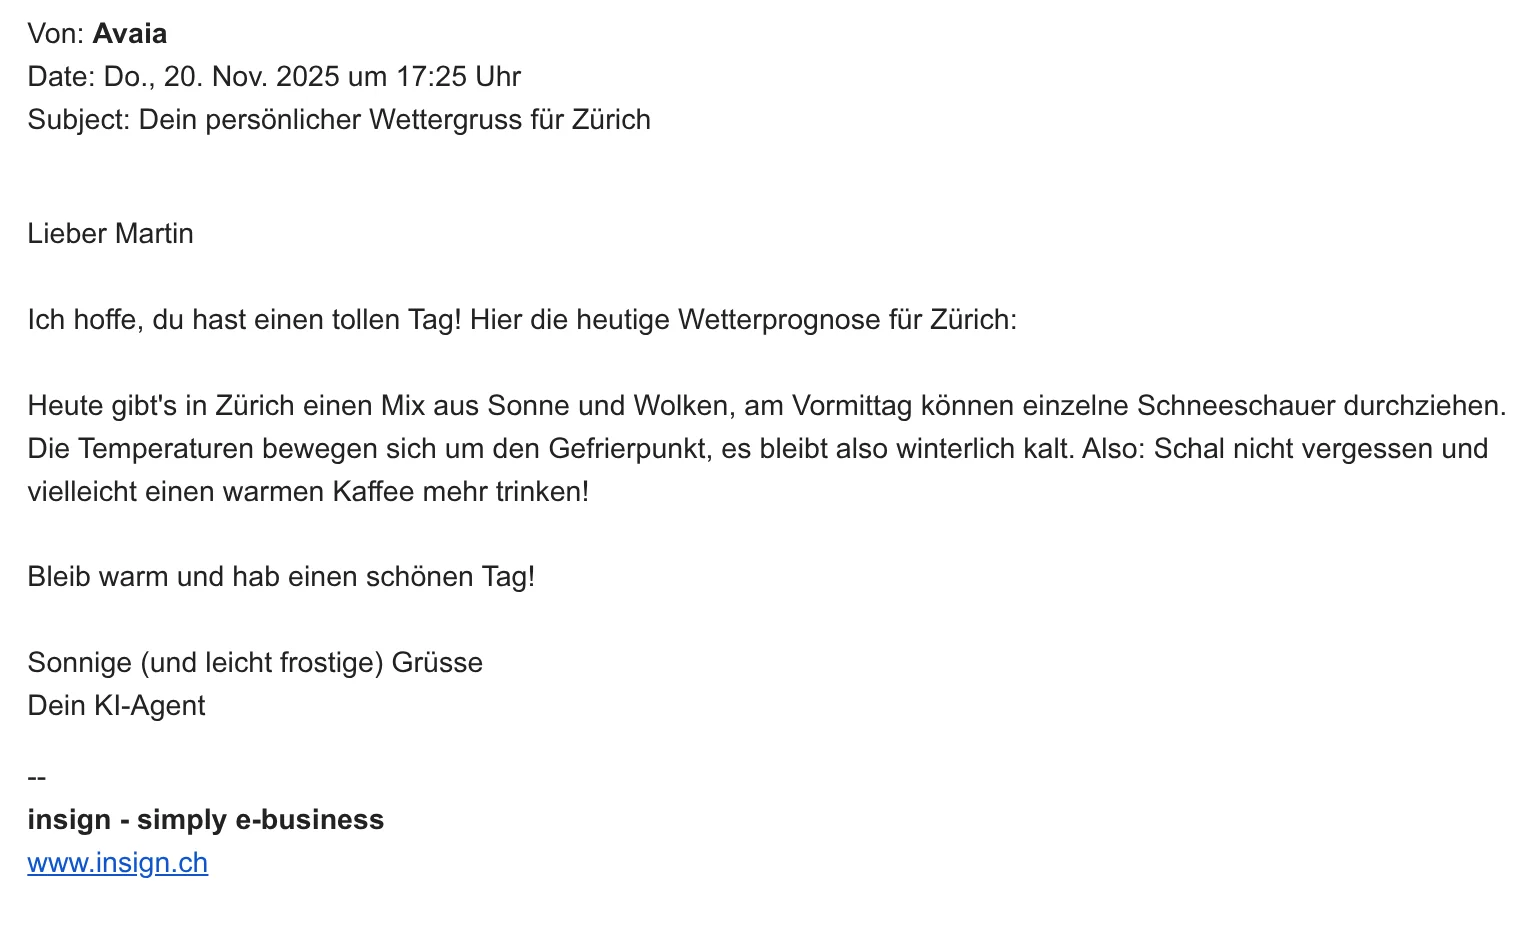
4. Practical Test - The First Agent Email
Time for the functionality test! Write to your agent:
"Dear agent, please send me a nice greeting with today's weather forecast for Zurich to my email address: [email protected]"
With "Send" configuration, you'll receive an email immediately. With "Create draft", you'll find the draft in your email program.
Pro Tips for Daily Use
Optimize agent prompts: Define in the agent prompt when emails should be used:
"When the user says 'email me', use the email tool and send the email to [email protected]"
Then a simple "email me the project summary" in the chat is enough.
Troubleshooting: If emails don't arrive:
- Check SMTP settings again
- Check spam folder
- Check mailbox status in configuration
Conclusion: Your Agents Are Now Email-Capable!
With this email integration, your AI agents become true digital assistants that can communicate proactively. Whether daily reports, project updates, or automatic notifications - the possibilities are endless.
What's next? In the next guide, we'll show how agents can automatically categorize incoming emails and even respond to them. Stay tuned!